
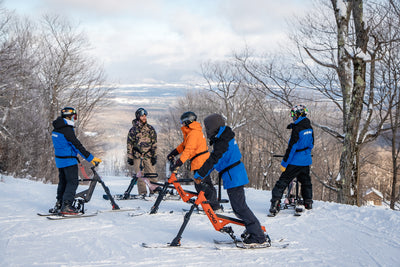
SETTING UP YOUR BIKE

Belt and Leash
Required by all ski resorts.
Use only one key ring to attach carabiner to leash.
Clip carabiner to your belt.

Body Position
Adjust handlebars to align your shoulders in a straight line through the fork and front ski.
The center of your hips should rest just in front of your ankles.

Turning and Stopping

Weight Distribution
Keep weight across all 3 skis while in motion.
Place a bit more emphasis on your front ski.

Starting a turn
Tip your bike by leaning on the handle bars.
DO NOT steer by twisting the bars.

Turning
Tipping the bike is essential to the SNO-GO turn.
Keep the front ski pointed in the direction you are traveling.

Stopping
As you tip the bike for a turn, push down on the front ski and straighten your downhill leg.
The faster you are going the more you will need to tip and apply pressure to the edges.

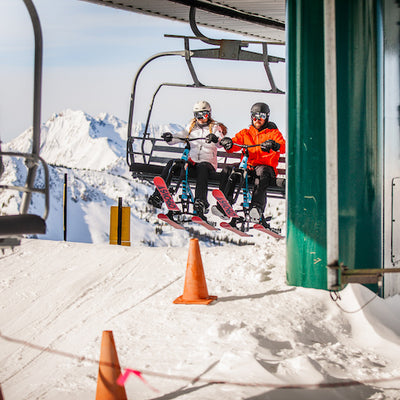
Loading and Unloading a Chairlift
General Rule: Chairlift capacity minus 1 rider. (ex. 3 rider per quad lift)

Loading - step 1
Approach the "load here" sign and place both feet on the ground
Straddle the bike.
DO NOT load next to the bike.

Loading - Step 2
Sit down first with your arms extended holding the handlebars.
As you leave the ramp, pull the bike in so the EZ-Load chairlift bar loads onto the seat between your legs.

Lower the safety bar
The bar can be lowered over the handlebars.
If the footrest interferes, rotate the bars or shift your bike over a few inches.

Unloading
Raise the front ski with arms and legs extended.
Push the bike forward when it hits the platform.
Look down for your bindings then standup on the stomp pads and ride away.

intermediate and advanced tips

Managing Speed
Make wide turns across the slope to stay in control.
Follow a rider with more skill until you are comfortable.
Downhill skiers and riders have the right of way.

Carving Turns
Maximize the bike tilt by releasing pressure on your inside leg to let your knee bend.
This naturally causes you to balance on your front ski and downhill foot causing you to carve turns.

SCrubbing speed
Short swift turns can help avoid obstacles and prepare for varied terrain.
Apply pressure on the front ski to allow more drift in the rear.
Re-engage your rear skis by applying pressure to the downhill foot similar to stopping.

Jumping and Moguls
Keeping your feet in the bindings is essential. Apply inward force through your feet while jumping.
Try some bunny hops on the flat ground until your feet stay in the bindings every time.
The responsibility code is an essential element to playing in the mountains safely. If you are new to the slopes, be sure to obey these rules for your safety and those around you.


SNO-GO FAQs
A SNO-GO ski bike is the most exciting new way for anyone to enjoy the winter ski slopes with no prior experience. The SNO-GO is a brilliantly engineered bike-like device with three skis, a chairlift loading hook, and an extremely easy learning curve for gliding down the ski slopes. Most people master the basics in under an hour and are able to join their friends that ski or snowboard as they venture about the entire mountain.
This would be the fastest growing new winter sport if it wasn't! The best thing you can do is try it for yourself.
SNO-GO Co-founders and long time friends Chase Wagstaff and Obed Marrder created the SNO-GO in the mid 2010's with the help of engineer Kevin Scheidle.
SNO-GO ski bikes use a patented linkage technology (S.L.A.T.) to enable the greatest control and performance of any ski bike ever created.
When a rider tilts the bike by leaning on the handlebars, the skis roll onto their edge to form perfect parallel turns which allows any rider to carve within minutes of riding.
A SNO-GO ski bike is the only ski bike manufactured to meet industry standards, follow existing ski and snowboarding patterns and chairlift compliance codes. The Type III used in a SNO-GO also offers the most stability. Read more here.
Learning FAQs
You may have seen different types of ski bikes out there. Discover what makes a SNO-GO bike the easiest. Read more.
Snowboard boots with rubber sole are the preferred choice but any snowboard boot (eva sole) or rugged winter boot will be sufficient to get started.
With SNO-GO's chairlift hook, riding the lifts is unbelieveably easy. Watch the tutorial video above for a quick how to.
Stopping works just like skiing. The rider tilts the skis on edge by leaning on the handlebars and uses friction to stop. SNO-GO was designed to be very intuitive for turning and stopping. Watch the video above for more info.
Most people can figure out how to ride a SNO-GO ski bike on their own within a few runs. Nonethless, first time snow sports thrill seekers are encouraged to take a lesson at a SNO-GO Ride Center through certified instructors. You can find a location near you here.
RESORT FAQs
See all of the resorts that allow our equipment here.
Resort policies can vary but a SNO-GO is very capable and can handle large table tops, boxes, and rails.
A SNO-GO Ride Center has more ski bikes available than most other resorts. SNO-GO also offers more locations to rent and try a ski bike than any other brand. Search our list of Ride Centers and rental partners across the globe here.
SNO-GO ski bikes handle all terrain but powder skis are recommended when it gets deep! Check out the SNO-GO powder skis.
Ski Biking 101
View all


 BUY
BUY LOCATIONS
 TUTORIAL
 Search